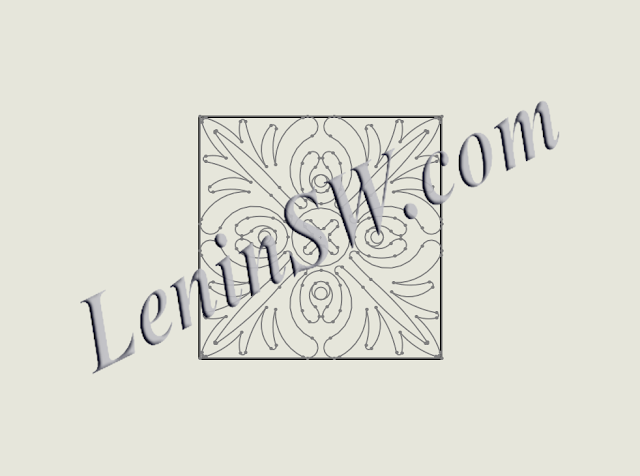
Тем кто моделирует изделия из дерева, наверняка приходилось вставлять изображение резьбы по дереву.
Имеется ввиду упрощенный эскиз выполненный в Компасе или AutoCAD, который вставляется в модель, а в чертеже включается изображение эскизов и отображаем нужный эскиз. Картинку портят метки центров и точки эскиза.
После того, как вставили в модель эскиз, в чертеже его необходимо отобразить. Для этого включаем отображение эскизов
Those who simulates wood products, for certain had to insert an image in wood carving. There is a view simplified sketch made in the Compass or of AutoCAD, which is inserted into the model, and is included in the drawing and display the thumbnail image of the desired thumbnail. The picture marks the center of Porto and the sketch point.
Once inserted into a model sketch in his drawing to be displayed. To do this, we turn on the display of thumbnails
После этого отображаем эскиз в дереве проектирования
After this sketch is displayed in a tree design
Полученное изображение гораздо лучше смотрится, чем первоначальное.
Следует отметить, что эти опции глобальные, т.е. это затронет отображение во всех чертежах. Ниже представлено видео на youtube.
The resulting image looks much better than the original.
Note that these options are global, i.e. this will affect the display of the drawings. Below is a video on youtube.
 | |
|
После того, как вставили в модель эскиз, в чертеже его необходимо отобразить. Для этого включаем отображение эскизов
Those who simulates wood products, for certain had to insert an image in wood carving. There is a view simplified sketch made in the Compass or of AutoCAD, which is inserted into the model, and is included in the drawing and display the thumbnail image of the desired thumbnail. The picture marks the center of Porto and the sketch point.
Once inserted into a model sketch in his drawing to be displayed. To do this, we turn on the display of thumbnails
 |
Отображаем эскиз в дереве проектирования
|
After this sketch is displayed in a tree design
 |
| Отображение эскиза |
Не совсем красиво.
Для того, чтобы привести изображение в приемлемый вид, надо в настройках Solidworks отключить соответствующие опции. Заходим в настройки.
Not quite nicely.
In order to bring the image in acceptable form, it is necessary in the settings Solidworks to disable the corresponding options. Go to settings
 |
| Заходим в настройки Go to settings |
 |
Снимаем галки с пунктов изображения центров дуг и точек эскиза
Remove chekbox with image centers of arcs and sketch points
|
 |
Изображение без центров дуг
Image no arc centers
|
 |
Изображение без центров дуг и точек эскиза.
Image no arc centers and sketch points.
|
Следует отметить, что эти опции глобальные, т.е. это затронет отображение во всех чертежах. Ниже представлено видео на youtube.
The resulting image looks much better than the original.
Note that these options are global, i.e. this will affect the display of the drawings. Below is a video on youtube.
Видео на альтернативном видеохостинге
Video on the alternate video sharing

Комментариев нет:
Отправить комментарий
Примечание. Отправлять комментарии могут только участники этого блога.